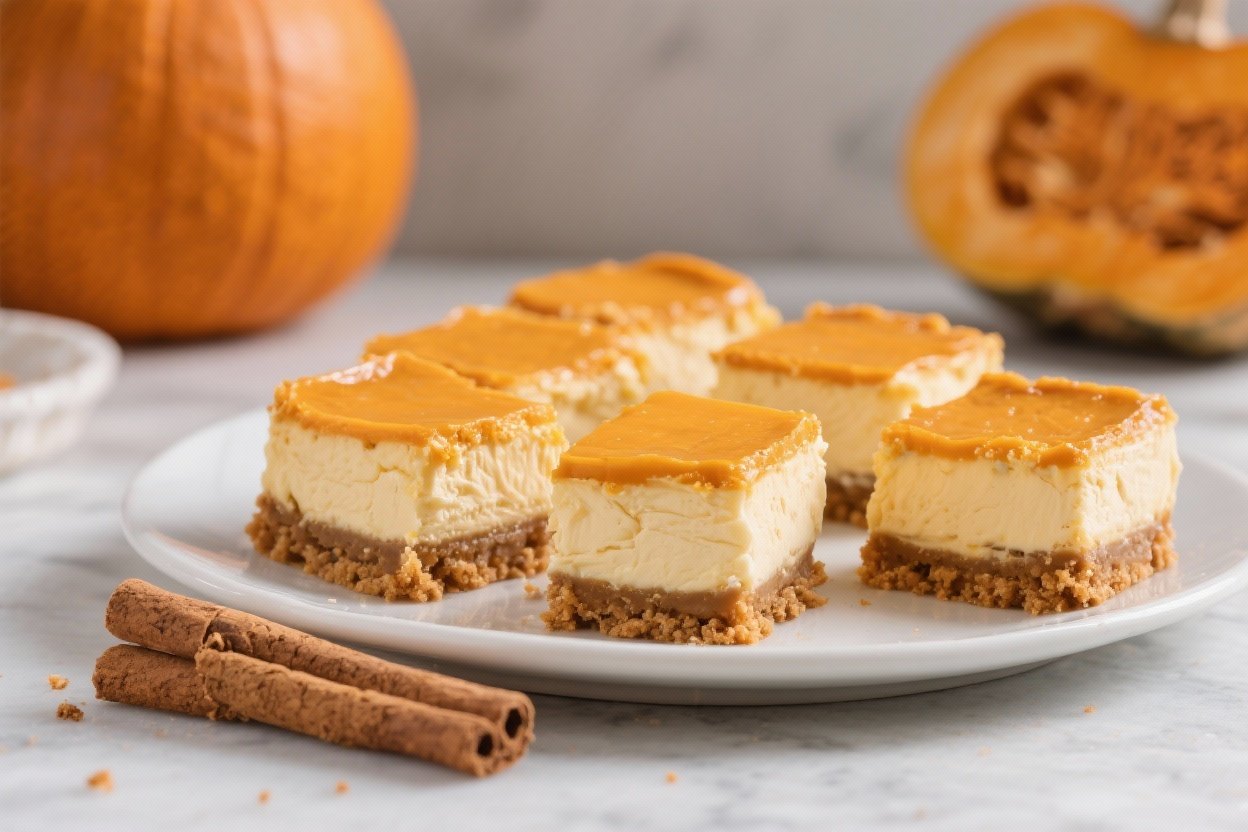
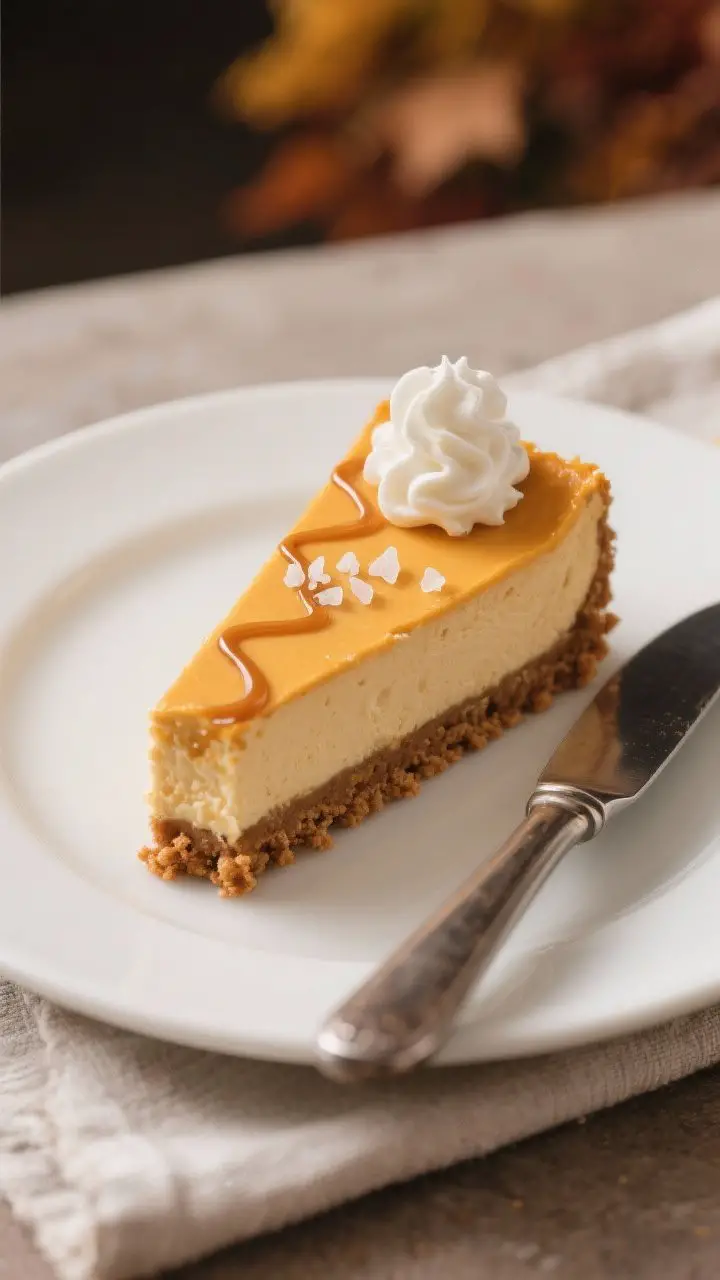
Pumpkin Cheesecake Bars with Gingersnap Crust: The Cozy, Crowd-Stealing Dessert You’ll Regret Not Making Twice
Forget basic pumpkin pie. These Pumpkin Cheesecake Bars with Gingersnap Crust bring bakery-level swagger to your kitchen without the stress or price tag. You get creamy, spiced cheesecake on a snappy, buttery ginger base that tastes like fall threw a party.
They slice clean, travel well, and disappear faster than you can say “Who took the last one?” If you’re hosting, this is the dessert that makes people ask for the recipe—then ask for leftovers.
The Secret Behind This Recipe
The magic is all about contrast. The gingersnap crust delivers a crisp, caramelized crunch that stands up to the velvety pumpkin cheesecake layer. That texture combo makes every bite feel balanced, not cloying or mushy.
We also bake at a moderate temp and cool properly to keep the cheesecake silky with minimal cracking. A little sour cream adds tang and smoothness, while brown sugar and warm spices deepen the pumpkin flavor. And yes, a pinch of salt—because desserts without salt are just sweet, not good.
What Goes Into This Recipe – Ingredients
- Gingersnap crust:
- 2 cups (about 240 g) gingersnap cookie crumbs
- 2 tablespoons granulated sugar
- 1/4 teaspoon fine sea salt
- 6 tablespoons unsalted butter, melted
- Pumpkin cheesecake filling:
- 16 ounces (450 g) cream cheese, softened
- 3/4 cup light brown sugar, packed
- 1/4 cup granulated sugar
- 1 cup pumpkin puree (not pie filling)
- 2 large eggs, room temperature
- 1/3 cup sour cream
- 1 teaspoon vanilla extract
- 1 1/2 teaspoons ground cinnamon
- 1/2 teaspoon ground ginger
- 1/4 teaspoon ground nutmeg
- 1/8 teaspoon ground cloves
- 1/4 teaspoon fine sea salt
- Optional toppings:
- Lightly sweetened whipped cream
- Crushed gingersnaps or a caramel drizzle
- Flaky sea salt for finishing
Instructions
- Prep the pan. Line a 9×9-inch baking pan with parchment, leaving overhang for easy lifting.
Preheat oven to 325°F (163°C).
- Make the crust. Combine gingersnap crumbs, sugar, and salt. Stir in melted butter until the crumbs look evenly damp and clump when pressed.
- Press and bake. Firmly press the mixture into the pan, creating an even layer with no loose spots. Bake 8–10 minutes until fragrant and slightly darkened.
Cool 5 minutes.
- Beat the cream cheese. In a large bowl, beat cream cheese on medium until very smooth, about 1–2 minutes, scraping the bowl. Lumps are the enemy.
- Add sugars and spices. Beat in brown sugar, granulated sugar, cinnamon, ginger, nutmeg, cloves, and salt until combined and fluffy.
- Mix in pumpkin, sour cream, and vanilla. Beat until silky. The batter should be smooth and cohesive.
- Add eggs last. Beat in eggs one at a time on low until just incorporated.
Overmixing introduces air and cracks—don’t do it.
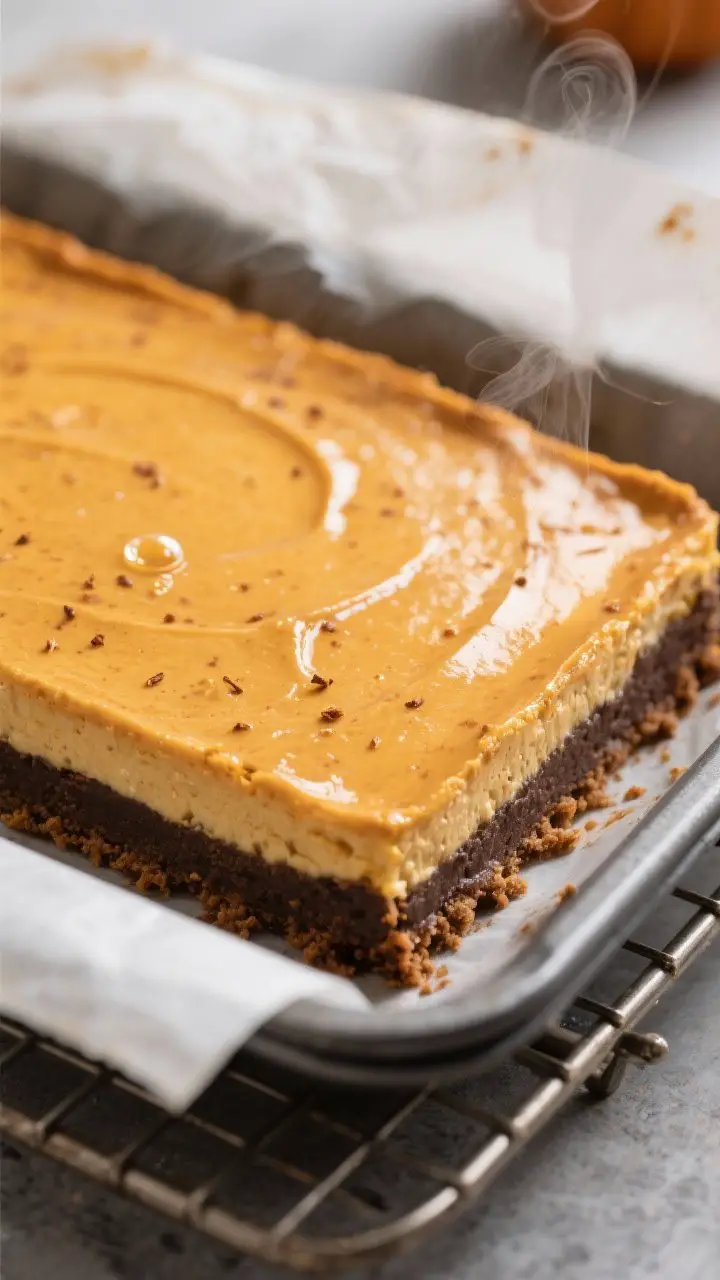
- Pour and smooth. Spread the filling over the warm crust. Tap the pan gently to pop air bubbles.
- Bake. Bake 28–35 minutes. The edges should be set; the center should jiggle slightly like Jell-O, not slosh like soup.
- Cool gradually. Turn off the oven, crack the door, and let bars rest inside 10 minutes.
Then cool on a rack until room temp.
- Chill to set. Refrigerate at least 4 hours, preferably overnight. This is where the texture gets dreamy.
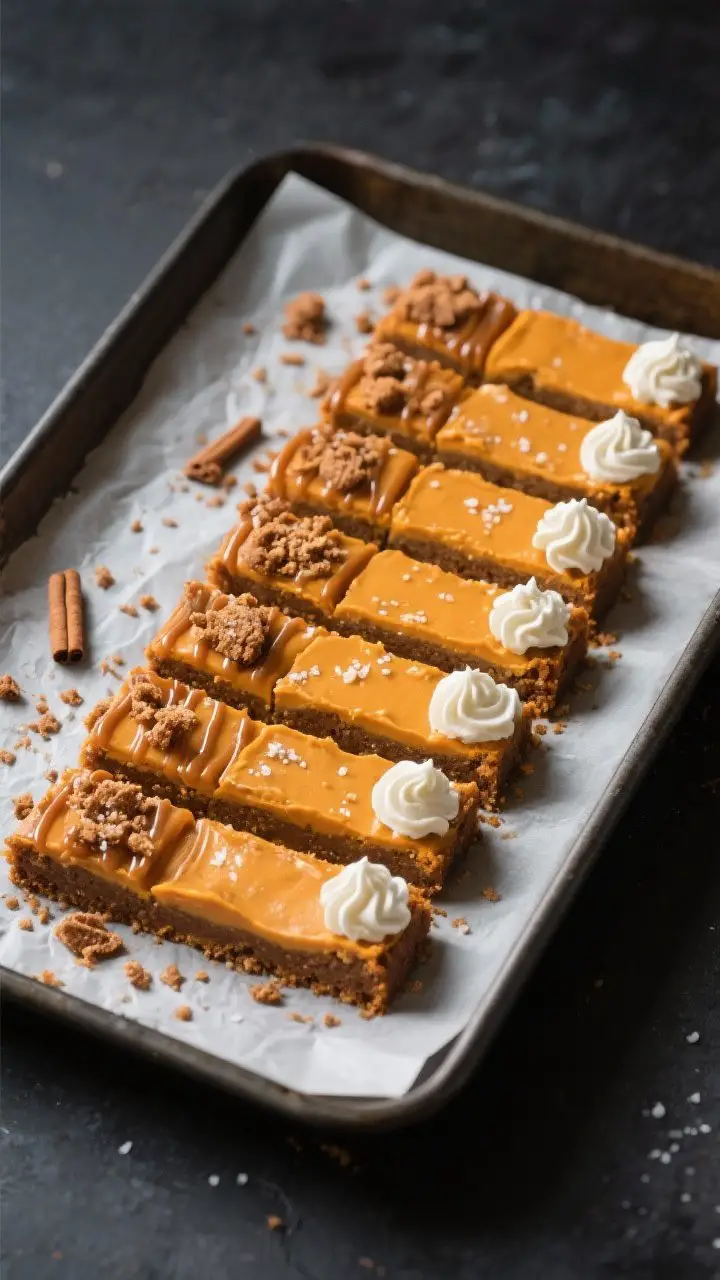
- Slice and serve. Lift out using parchment. Warm a sharp knife under hot water, wipe dry, and cut into 16–20 bars.
Finish with whipped cream, crushed gingersnaps, or a sprinkle of flaky salt.
Storage Tips
- Refrigerate: Store covered for up to 5 days. Keep toppings separate to preserve texture.
- Freeze: Freeze bars (unsliced or sliced) tightly wrapped for up to 2 months. Thaw overnight in the fridge.
- Transport: Keep chilled until serving.
A cold pan makes clean cuts and confident arrivals.
Health Benefits
- Pumpkin power: Pumpkin brings beta-carotene, fiber, and potassium to the party. It’s basically a veggie in dessert clothing.
- Protein boost: Cream cheese and eggs add protein, which helps these bars feel satisfying, not like a sugar bomb.
- Spice benefits: Cinnamon and ginger aren’t just cozy—they’ve been linked with antioxidant and digestive perks. No, it’s not a salad, but it’s not nothing.
- Smart sweetness: Using brown sugar adds depth, so you can keep sweetness balanced without piling it on.
Taste matters, IMO.
What Not to Do
- Don’t use pumpkin pie filling. It’s pre-sweetened and spiced; your cheesecake will be chaos-level sweet.
- Don’t skip room temp dairy. Cold cream cheese = lumpy batter and streaky bars.
- Don’t overbake. A firm center in the oven means dry, crumbly cheesecake later. Aim for that slight jiggle.
- Don’t stir eggs aggressively. Overmixing adds air and cracks. Gentle is the move.
- Don’t cut warm. Warm bars will smear and break.
Patience pays off.
Alternatives
- No gingersnaps? Use graham crackers plus 1 tablespoon molasses and 1/2 teaspoon ground ginger for similar vibes.
- Gluten-free: Swap in gluten-free gingersnaps and ensure your other ingredients are GF-certified.
- Lighter version: Use Neufchâtel (1/3 less fat) and Greek yogurt in place of sour cream. Texture stays creamy with a slight tang.
- Maple twist: Replace 1/4 cup brown sugar with pure maple syrup; bake a few minutes longer if needed.
- Spice swap: Use 2 teaspoons pumpkin pie spice if you don’t want to measure individual spices.
- Dairy-free: Use dairy-free cream cheese, coconut yogurt, and plant butter. Expect a slightly softer set but great flavor.
- Swirl effect: Reserve 1/2 cup plain cheesecake batter before adding pumpkin; dollop and swirl on top for bakery aesthetics.
Totally extra, totally worth it.
FAQ
Can I make these ahead for a party?
Yes. Make 1–2 days ahead, chill, and slice the day of serving. Hold off on toppings until right before guests arrive for maximum crunch and prettiness.
Why did my cheesecake crack?
Common culprits: overmixing after adding eggs, overbaking, or rapid cooling.
Next time, mix gently, bake until just set with a jiggle, and cool gradually with the oven door cracked.
Do I need a water bath?
No. Bars bake evenly in a shallow pan, and the lower temp plus proper cooling keeps cracks minimal. A water bath is nice but not required here.
Which gingersnaps work best?
Go for crisp, classic gingersnaps (store-bought or homemade) that crumble easily.
Soft cookies won’t create a sturdy crust and will bake up soggy—hard pass.
Can I use fresh pumpkin puree?
Yes, but drain it well. Homemade puree can be wetter than canned. If it’s loose, strain through cheesecloth or simmer to reduce moisture.
How do I get super clean slices?
Chill overnight, use a hot, dry knife, and wipe between cuts.
It’s a tiny bit fussy, but those sharp edges scream “pro baker.” FYI, a bench scraper also works wonders.
What pan size can I use instead of 9×9?
An 8×8 pan yields thicker bars and may need a few extra minutes. A 9×13 pan works for thinner bars—start checking around 20–24 minutes.
Can I reduce the sugar?
You can drop total sugar by about 20% without losing structure. Flavor will be less caramel-y, but still good.
Don’t cut it in half unless you like sad cheesecake.
Wrapping Up
These Pumpkin Cheesecake Bars with Gingersnap Crust deliver the fall flavor trifecta: creamy, spicy, and satisfyingly crisp. They’re simple enough for weeknights, classy enough for holidays, and portable enough for potlucks. Make a pan, stash a secret slice for yourself (you’ll thank me), and watch them vanish like seasonal lattes in November.
Ready to upgrade your dessert game? This is the move.