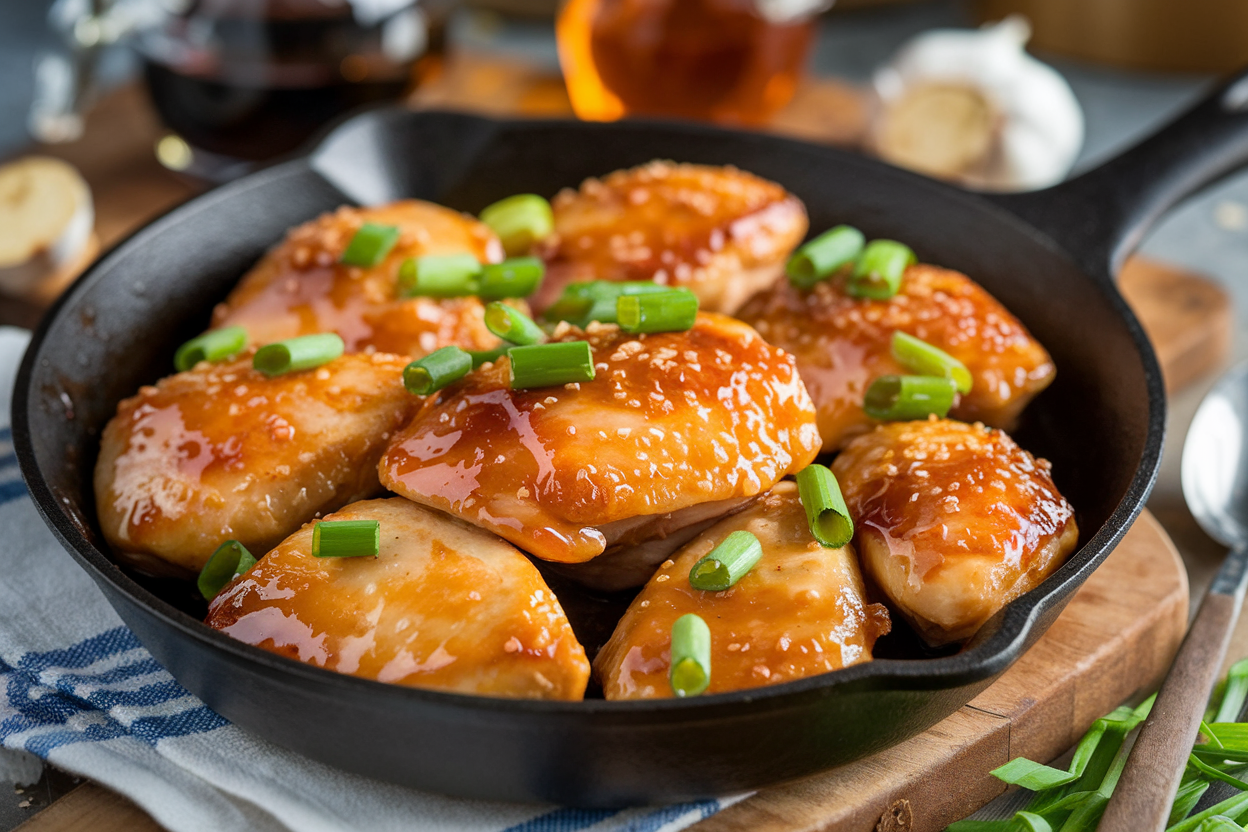
Easy Honey Garlic Chicken Skillet: 20-Minute Sticky-Savory Magic You’ll Make on Repeat
You worked all day, your brain’s at 12% battery, and dinner still needs to happen. This is when most people surrender to takeout. Not you.
You’re about to throw down a skillet winner that’s sweet, garlicky, and wildly satisfying—with zero weird ingredients and almost no cleanup. If you can stir, flip, and resist eating the sauce with a spoon, you’ve got this.
Why This Recipe Works
There’s a reason honey-garlic anything goes viral: it nails the sweet-salty-umami trifecta without trying too hard. The honey caramelizes and clings to the chicken, giving you that sticky glaze your fork keeps chasing.
Fresh garlic adds punch, soy sauce lays down depth, and a squeeze of lemon wakes the whole thing up. Cooked in one skillet, it’s fast, consistent, and hard to mess up—even if you “eyeball” half the ingredients (we see you).
Ingredients
- 1.5 pounds boneless, skinless chicken thighs, trimmed and patted dry (or breasts, see notes)
- 1/2 teaspoon kosher salt and 1/2 teaspoon black pepper
- 2 tablespoons cornstarch (for light coating and gloss)
- 1–2 tablespoons neutral oil (avocado, canola, or light olive oil)
- 4 cloves garlic, minced (go big or go home)
- 1/3 cup honey
- 3 tablespoons low-sodium soy sauce
- 1 tablespoon rice vinegar (or apple cider vinegar)
- 1 tablespoon lemon juice (fresh is best)
- 1/2 teaspoon crushed red pepper flakes (optional, for heat)
- 1/3 cup water or chicken broth
- 1 teaspoon sesame oil (optional, for finish)
- Sesame seeds and sliced scallions for garnish
Let’s Get Cooking – Instructions
- Prep the chicken. Cut thighs into bite-size pieces (about 1 to 1.5 inches). Pat dry, then toss with salt, pepper, and cornstarch until lightly coated.
- Heat the skillet. Add oil to a large skillet over medium-high heat.
When it shimmers, add chicken in a single layer. Don’t crowd; work in batches if needed.
- Brown like you mean it. Cook 3–4 minutes per side until golden and just cooked through. Remove to a plate.
Keep the tasty browned bits in the pan—those are flavor gold.
- Sauce setup. Lower heat to medium. Add a small splash of oil if necessary, then add minced garlic. Stir 30 seconds until fragrant (not burnt—garlic has trust issues).
- Build the glaze. Stir in honey, soy sauce, rice vinegar, lemon juice, red pepper flakes, and water/broth.
Simmer 2–3 minutes, scraping up the browned bits.
- Thicken and gloss. Return chicken and any juices to the skillet. Toss to coat and simmer 2–3 minutes until the sauce reduces to a glossy glaze. If too thick, add a tablespoon of water.
If too thin, simmer another minute.
- Finish strong. Turn off heat. Stir in sesame oil. Taste and adjust—more lemon for brightness, more honey for sweet, or a dash of soy for salt.
- Garnish and serve. Sprinkle with sesame seeds and scallions.
Serve over rice, cauliflower rice, noodles, or tucked in lettuce wraps. Flex your applause.
Storage Tips
- Fridge: Store in an airtight container for up to 4 days. The sauce will thicken in the fridge—total win.
- Reheat: Warm gently in a skillet over medium heat with a splash of water to loosen the glaze, or microwave in 30-second bursts, stirring between.
- Freezer: Freeze in portions for up to 2 months.
Thaw overnight in the fridge. Reheat as above; add a squeeze of lemon to wake it up.
- Meal prep: Pack with rice and steamed broccoli. IMO, it tastes even better on day two.
Why This is Good for You
Chicken thighs bring high-quality protein and iron without the dryness risk of leaner cuts.
The honey provides quick energy and, unlike table sugar, brings trace compounds that play nice with flavor and browning. Garlic supports heart health and adds antioxidant punch—plus, it makes your kitchen smell like you actually know what you’re doing. Balanced with vinegar and lemon, the glaze isn’t just sweet; it’s flavor-balanced, which helps with satisfaction and portion control.
In short: big payoff, minimal junk.
What Not to Do
- Don’t overcrowd the pan. Overlapping chicken steams instead of browns, and then you wonder where the flavor went.
- Don’t burn the garlic. If it turns dark brown, start the sauce step over. Bitter garlic = sadness.
- Don’t skip the cornstarch. It helps the chicken sear and the sauce cling. No cornstarch?
Use flour in a pinch.
- Don’t boil the sauce on high. You’ll caramelize the honey into taffy territory. Gentle simmer is the move.
- Don’t forget to taste. Sauces are personal. Adjust sweet, salt, acid to your vibe.
Recipe Variations
- Crispy breast version: Use 1.5 lbs chicken breasts, pounded to even thickness and sliced.
Cook slightly less time. Add 1 extra tablespoon butter at the end for richness.
- Ginger-kick: Add 1 tablespoon freshly grated ginger with the garlic. Bright, zingy, borderline addictive.
- Veg-loaded: Toss in snap peas, broccoli florets, or bell peppers after sautéing garlic.
Cook 2–3 minutes before adding sauce.
- Spicy gochujang twist: Stir in 1 tablespoon gochujang with the honey-soy mix for sweet heat and extra umami.
- Orange garlic: Swap lemon juice for 2 tablespoons orange juice and add 1 teaspoon zest. Think takeout, but cleaner.
- No-soy, gluten-free: Use coconut aminos and a pinch of salt. Check that your cornstarch is labeled gluten-free.
- Air fryer hack: Toss seasoned, cornstarch-coated chicken with 1 tablespoon oil.
Air fry at 390°F for 10–12 minutes, shaking once. Simmer sauce on stovetop, then toss together.
FAQ
Can I make this with frozen chicken?
Thaw first for best browning and texture. If you must cook from frozen, use whole thighs in a covered skillet over medium heat until thawed, then drain liquid, cut, and proceed.
Flavor improves dramatically once excess moisture is gone.
Is there a way to reduce the sugar?
Yes. Use 3–4 tablespoons honey and add 1–2 tablespoons orange juice or extra lemon to maintain balance. You can also add a cornstarch slurry (1 teaspoon cornstarch + 1 tablespoon water) to keep the glaze body without extra sweetener.
What side dishes work best?
Steamed rice, coconut rice, garlicky green beans, sautéed bok choy, or roasted broccoli.
Noodles are elite with this sauce—udon, rice noodles, or even spaghetti if that’s what’s in the pantry.
Can I use pre-minced garlic from a jar?
You can, but fresh garlic delivers better aroma and bite. If using jarred, add an extra clove’s worth and reduce the sauté time so it doesn’t overcook.
How do I keep the chicken juicy?
Use thighs, don’t overcook, and let the meat rest in the sauce off heat for a minute. If using breasts, cut evenly and pull them as soon as they’re cooked through—no heroics.
Can I double the recipe?
Absolutely.
Sear in batches so you maintain good browning, then combine everything to glaze. Increase simmer time by a minute or two if needed to thicken the extra sauce.
What if my sauce tastes too salty?
Add a teaspoon of honey and a squeeze of lemon, plus a splash of water. Low-sodium soy is your friend here; full-sodium can sneak up on you.
How thick should the glaze be?
It should coat the back of a spoon and slowly drip off.
Remember, it thickens as it cools. If it clings like caramel, add a tablespoon of water and stir.
Wrapping Up
“Easy Honey Garlic Chicken Skillet” is that rare unicorn: weeknight-fast, weekend-worthy, and totally kid-approved. It’s saucy without being messy, bold without being fussy, and flexible enough for whatever’s in your fridge.
Keep thighs in the freezer, honey in the pantry, and garlic on deck—you’ve basically got a dinner cheat code. Now go earn those compliments (and maybe hide the leftovers, just saying).